Creating an ADSB receiver with a Raspberry Pi
If you are looking for a fun project to do for a few days and potentially expand on it, this is it. When I began my project, I started with a Raspberry Pi 3B (1G RAM) that I already owned. I suggest getting a Model 3b+ or higher for this project. I initially started from the tutorial available on FlightRadar24’s site, located here https://www.flightradar24.com/build-your-own. They have their own image called “Pi24” which you can image onto a 4GB MicroSD card.
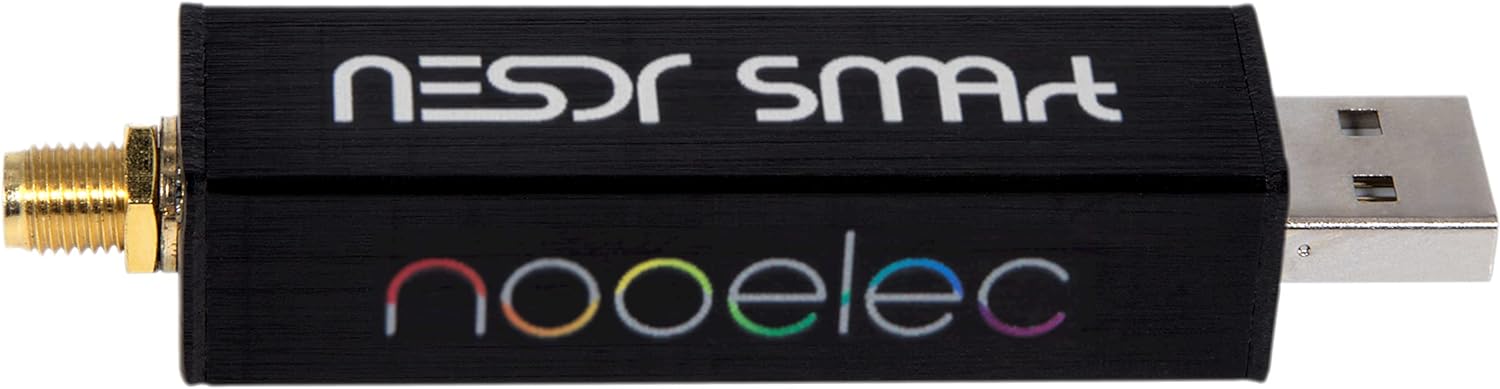
In addition to providing an image, they also make recommendations on ADS-B USB dongles for you Pi. I went with the Nooelec RTL-SDR v5 Bundle which you can find on Amazon or at Nooelec (https://www.nooelec.com/store/)
The Installation Process
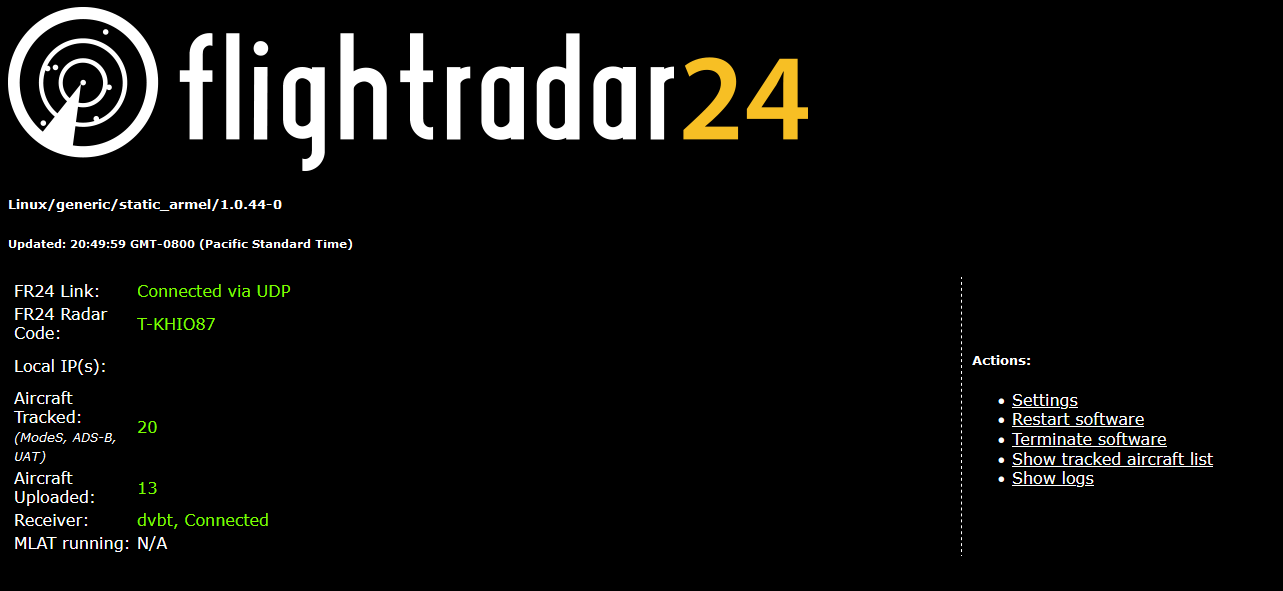
Once you image your Pi and install your SDR, you are ready to power it up. You will need to locate your local address and SSH into it. The username is `pi` and the password is `raspberry` just like regular Pi images. Once you have that IP Address, head over to HTTP://IP-ADDRESS:8754/. This is your FlightRadar Web Server which looks something like this:
Sign into your Flightradar24.com account and follow this link to activate your Pi24: https://www.flightradar24.com/activate-raspberry-pi. I initially had some issues with the settings page on the internal web server. But you might have to manually assign your sharing key.
If you are interested in using the raw data feed to build your own visuals with software such as VirtualRadar, you are going to want to enable “RAW data” on Port 30002 while you are on the settings page.
Establishing your RAW data feed
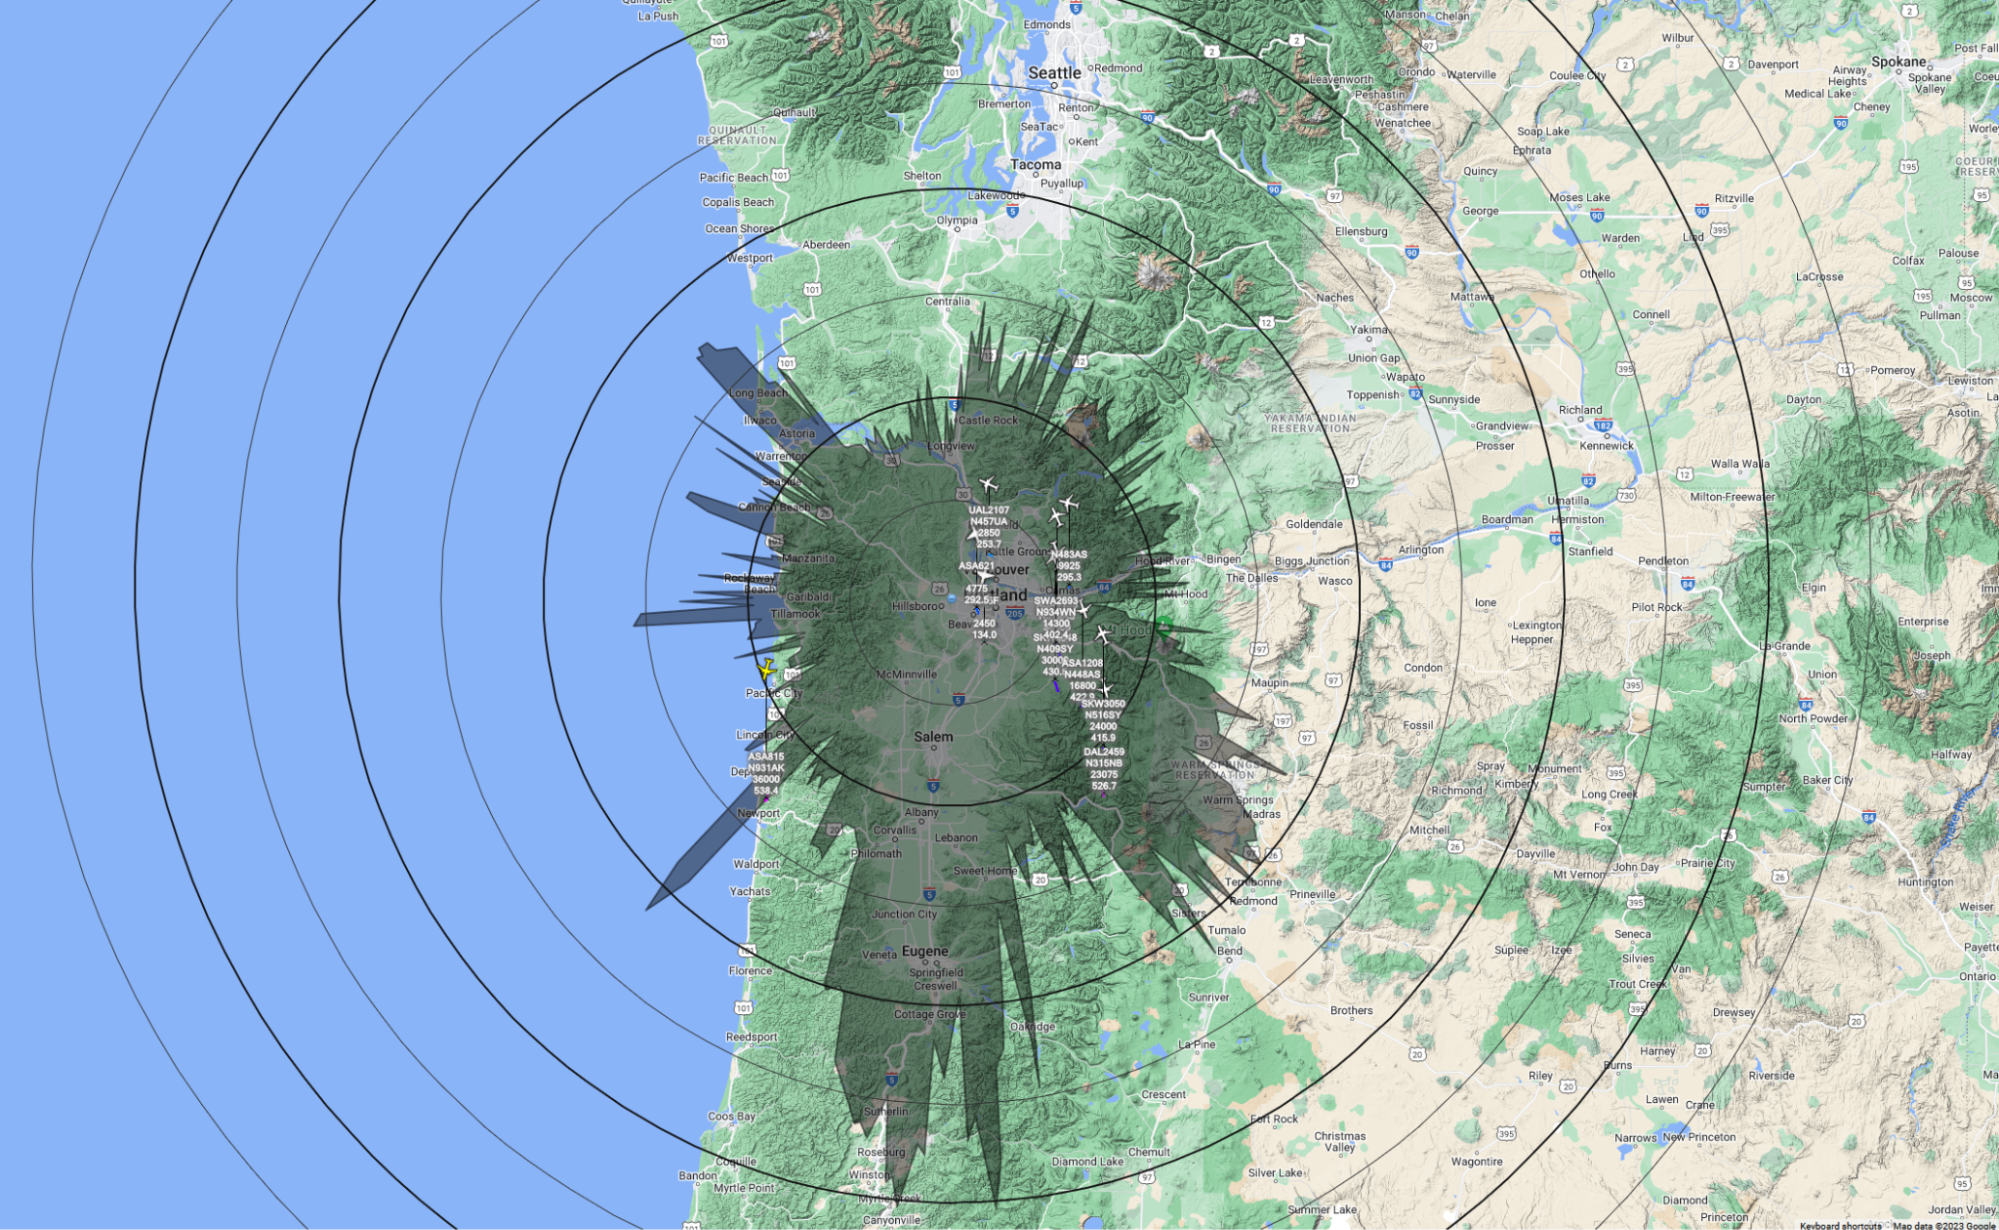
While contributing to the FlightRadar24 network is fun, you really don’t get to see exactly what your station is picking up. There is the tracked aircraft list but that’s all it is, a list. Let’s have a bit more fun and use the RAW data feed to visualize our receivers range.
For this, I decided to go with Virtual Radar Server which you can download at https://www.virtualradarserver.co.uk/. It is rather simple to set up and starts at the click of the button. Once you have it open, goto “Tools -> Options” and navigate to “Receivers” and add a new receiver. You can run the installation Wizard on the top right or enter the following settings:
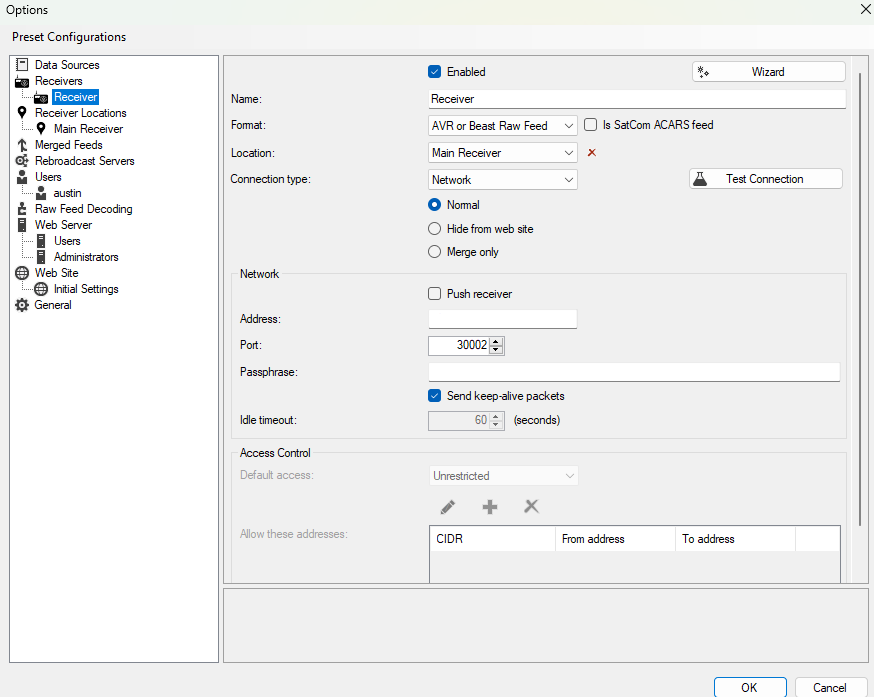
Name:Format: AVR or Beast Raw FeedLocation: Connection Type: Network (Normal)Network Address: Network Port: 30002 (We enabled it earlier on the FlightRadar web server)
NOTE: If your receiver has latency due to the distance away from your router, you could disable “Send keep-alive packets”
Once you save your settings, you will see something like this.

Stationing your Receiver
Once you have activated your Raspberry Pi, you are going to want to move it to an ideal location. Since I am currently renting an apartment and don’t have the luxury of creating a permanent fixture to the side of my place and fixing an antenna. The initial antenna I received from Nooelec did great for my immediate area but I was not receiving as many messages from aircraft nearby or further out. My goal was to aim for receival rate while increasing my range. Time for an antenna upgrade.
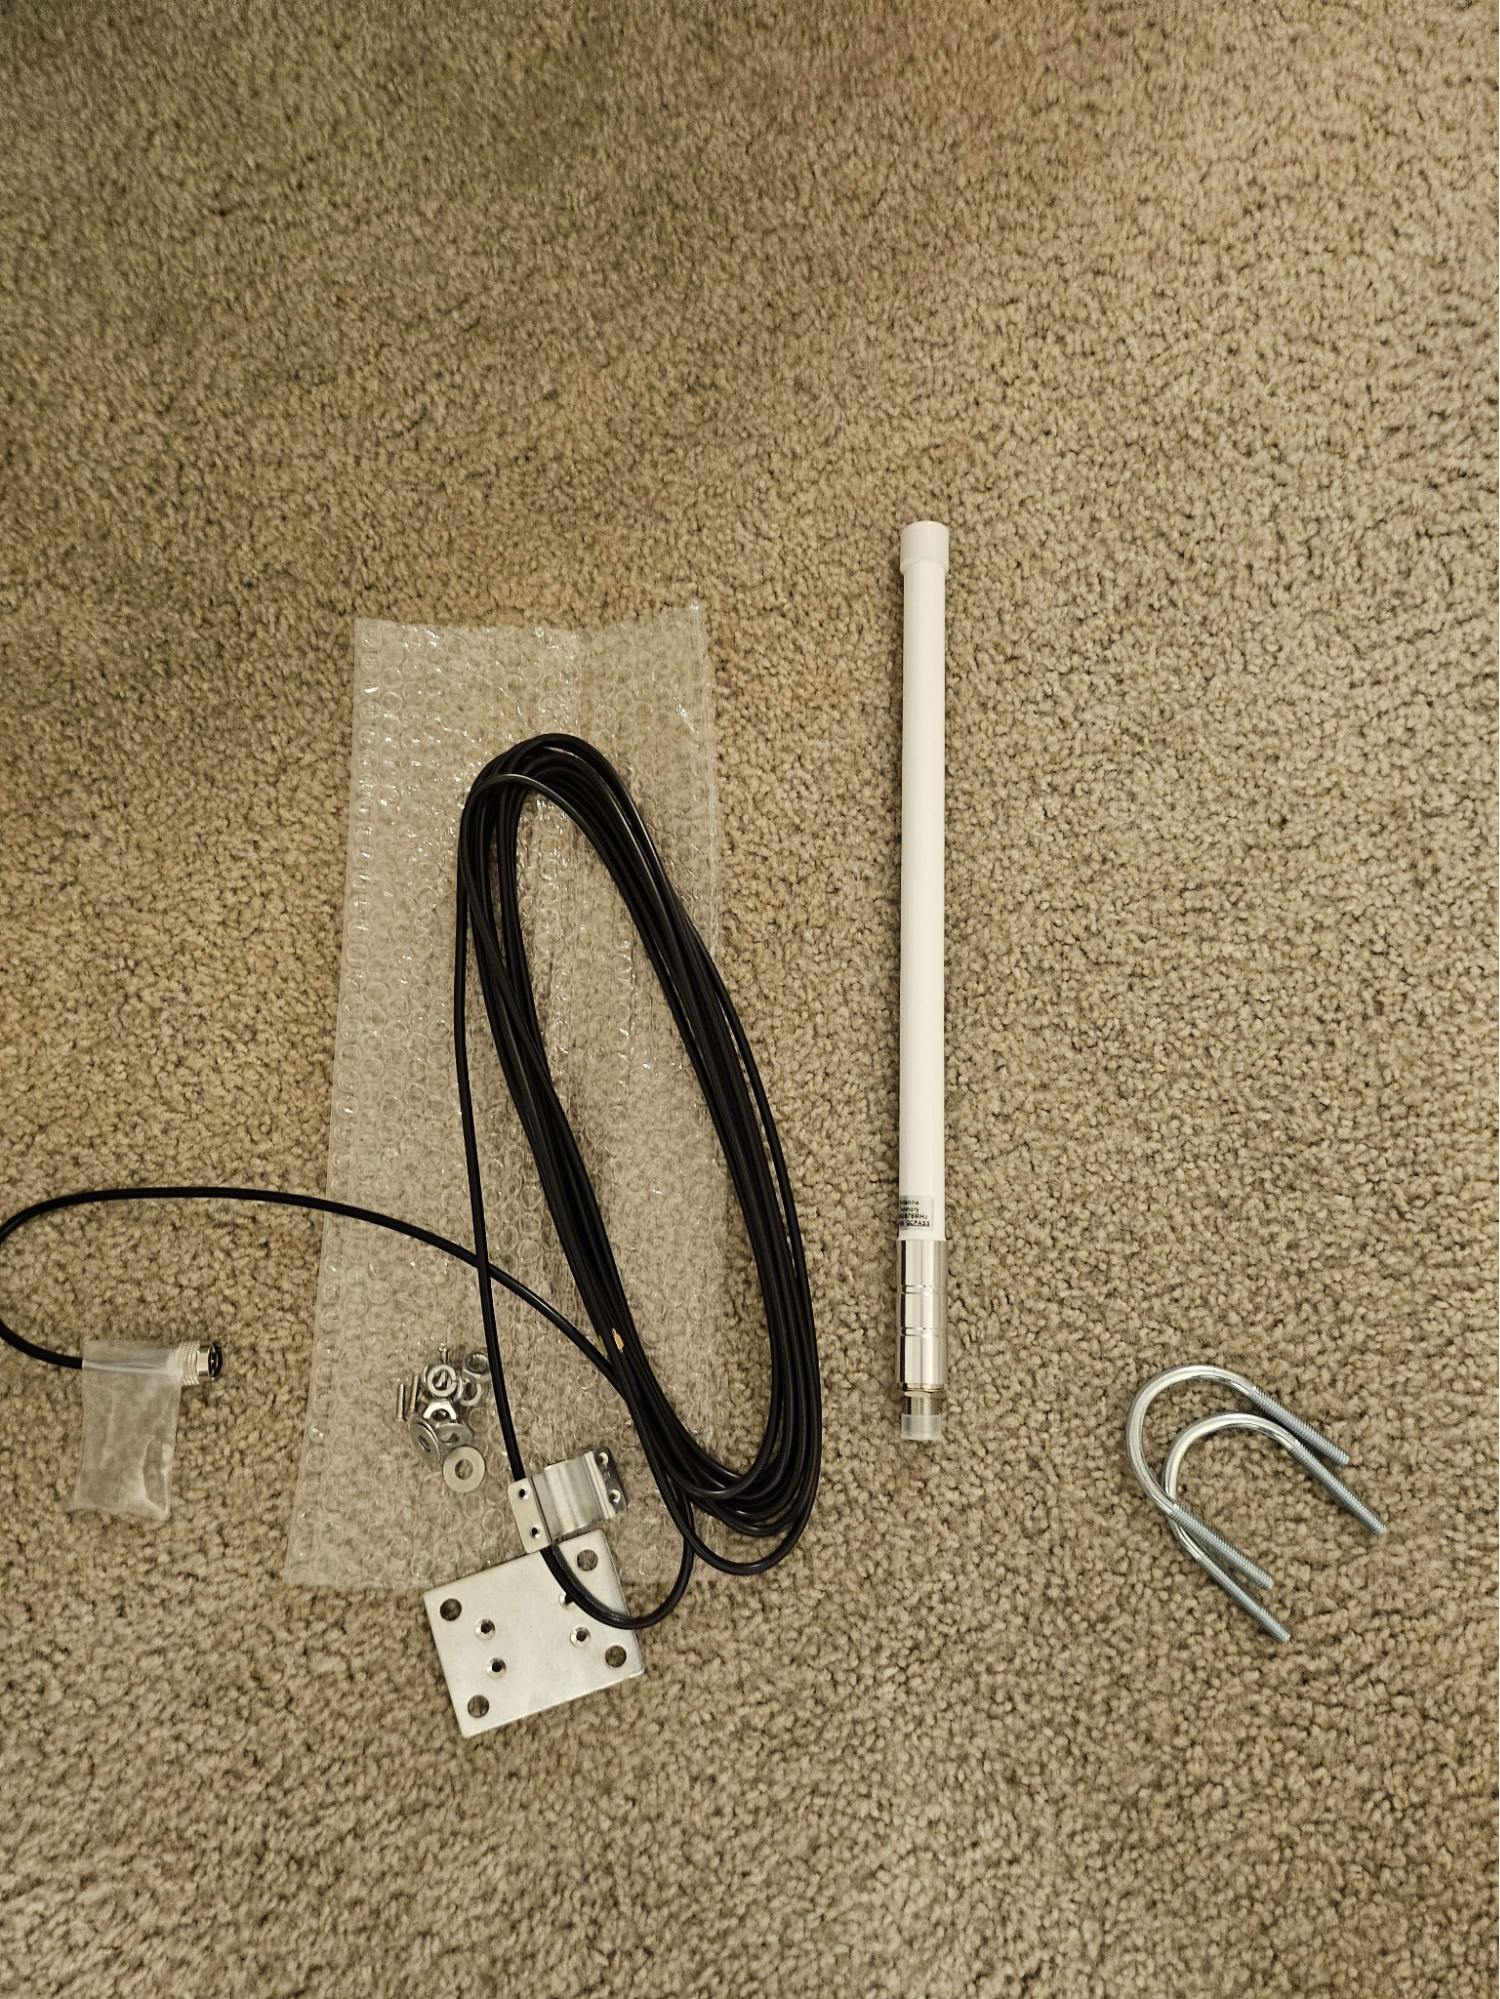
After a few days of running the standard antenna, I went on to Amazon and purchased an 18 inch 1090MHz ADS-B Antenna with a SMA connector. I received it the next day and hatched a plan to extend my range. I happen to be located on a corner unit with a flag pole holder already attached to the back porch support. I went to my local Home Depot and fashioned a copper plumbing pipe with a 45 Degree self-tapping fitting and another PVC pipe that I could cut down.
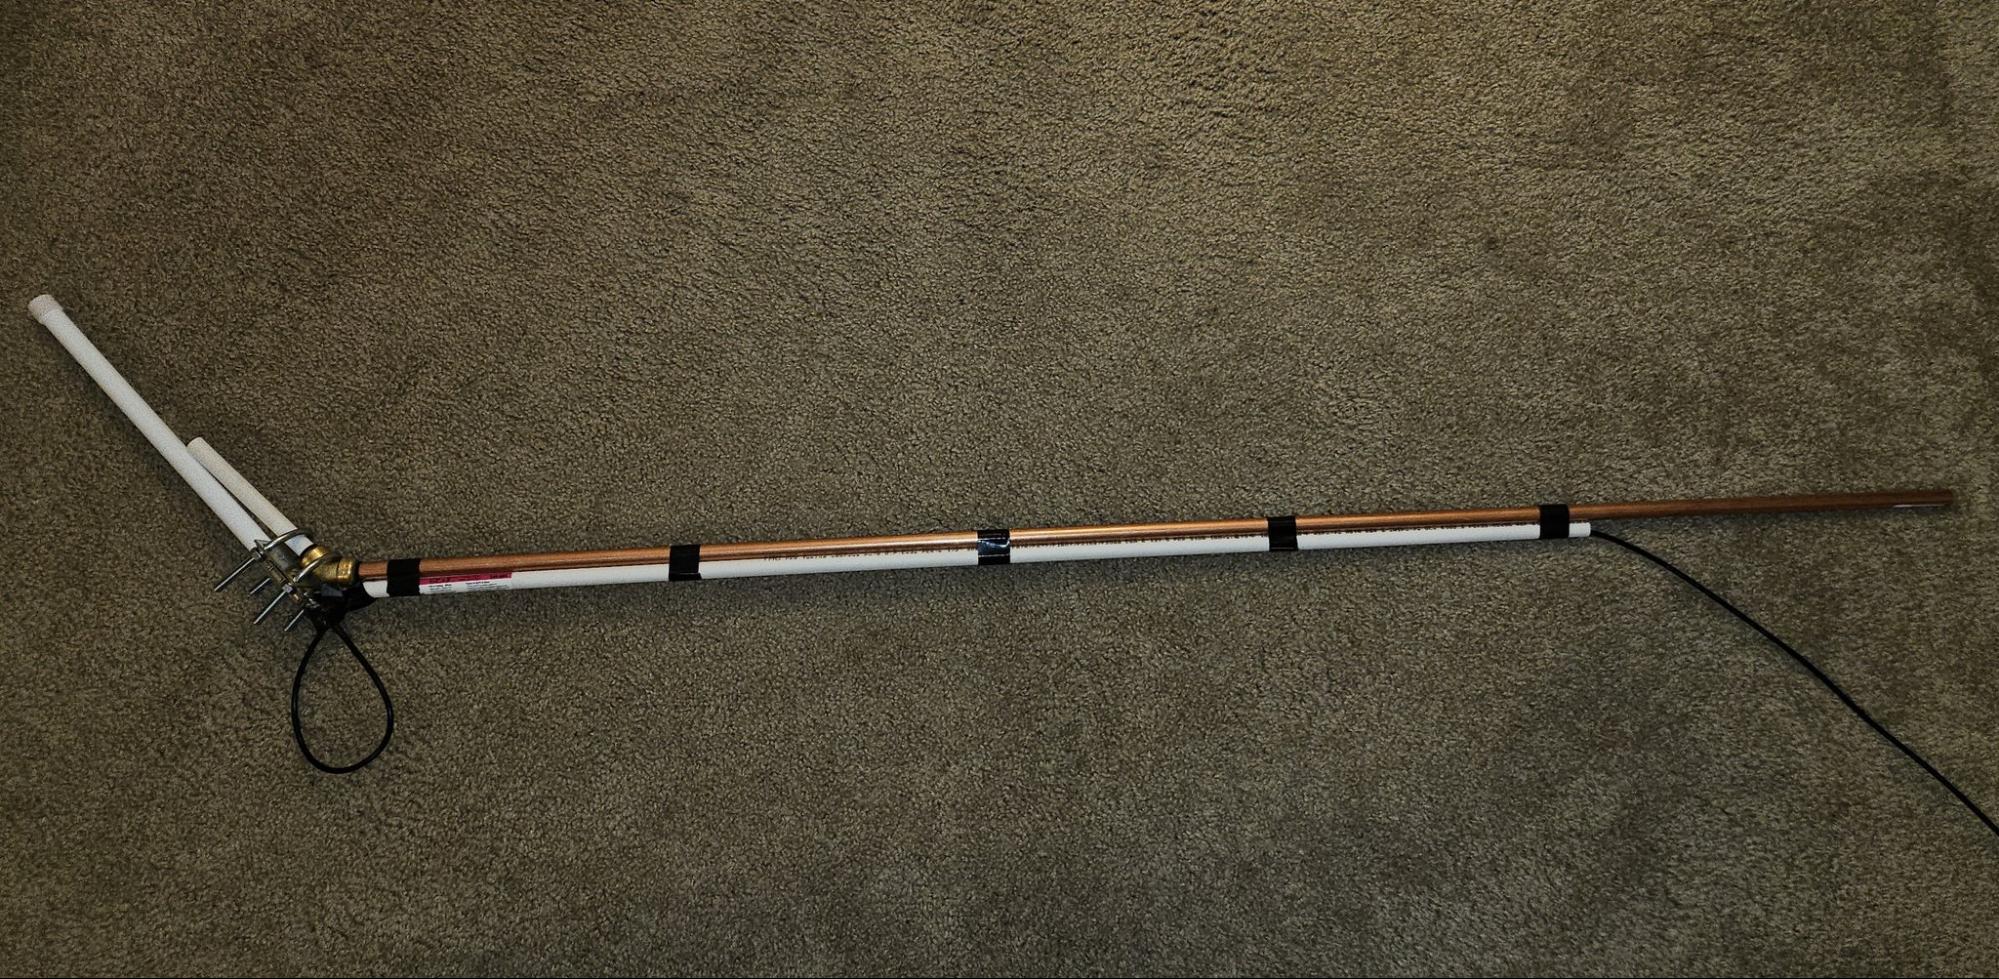
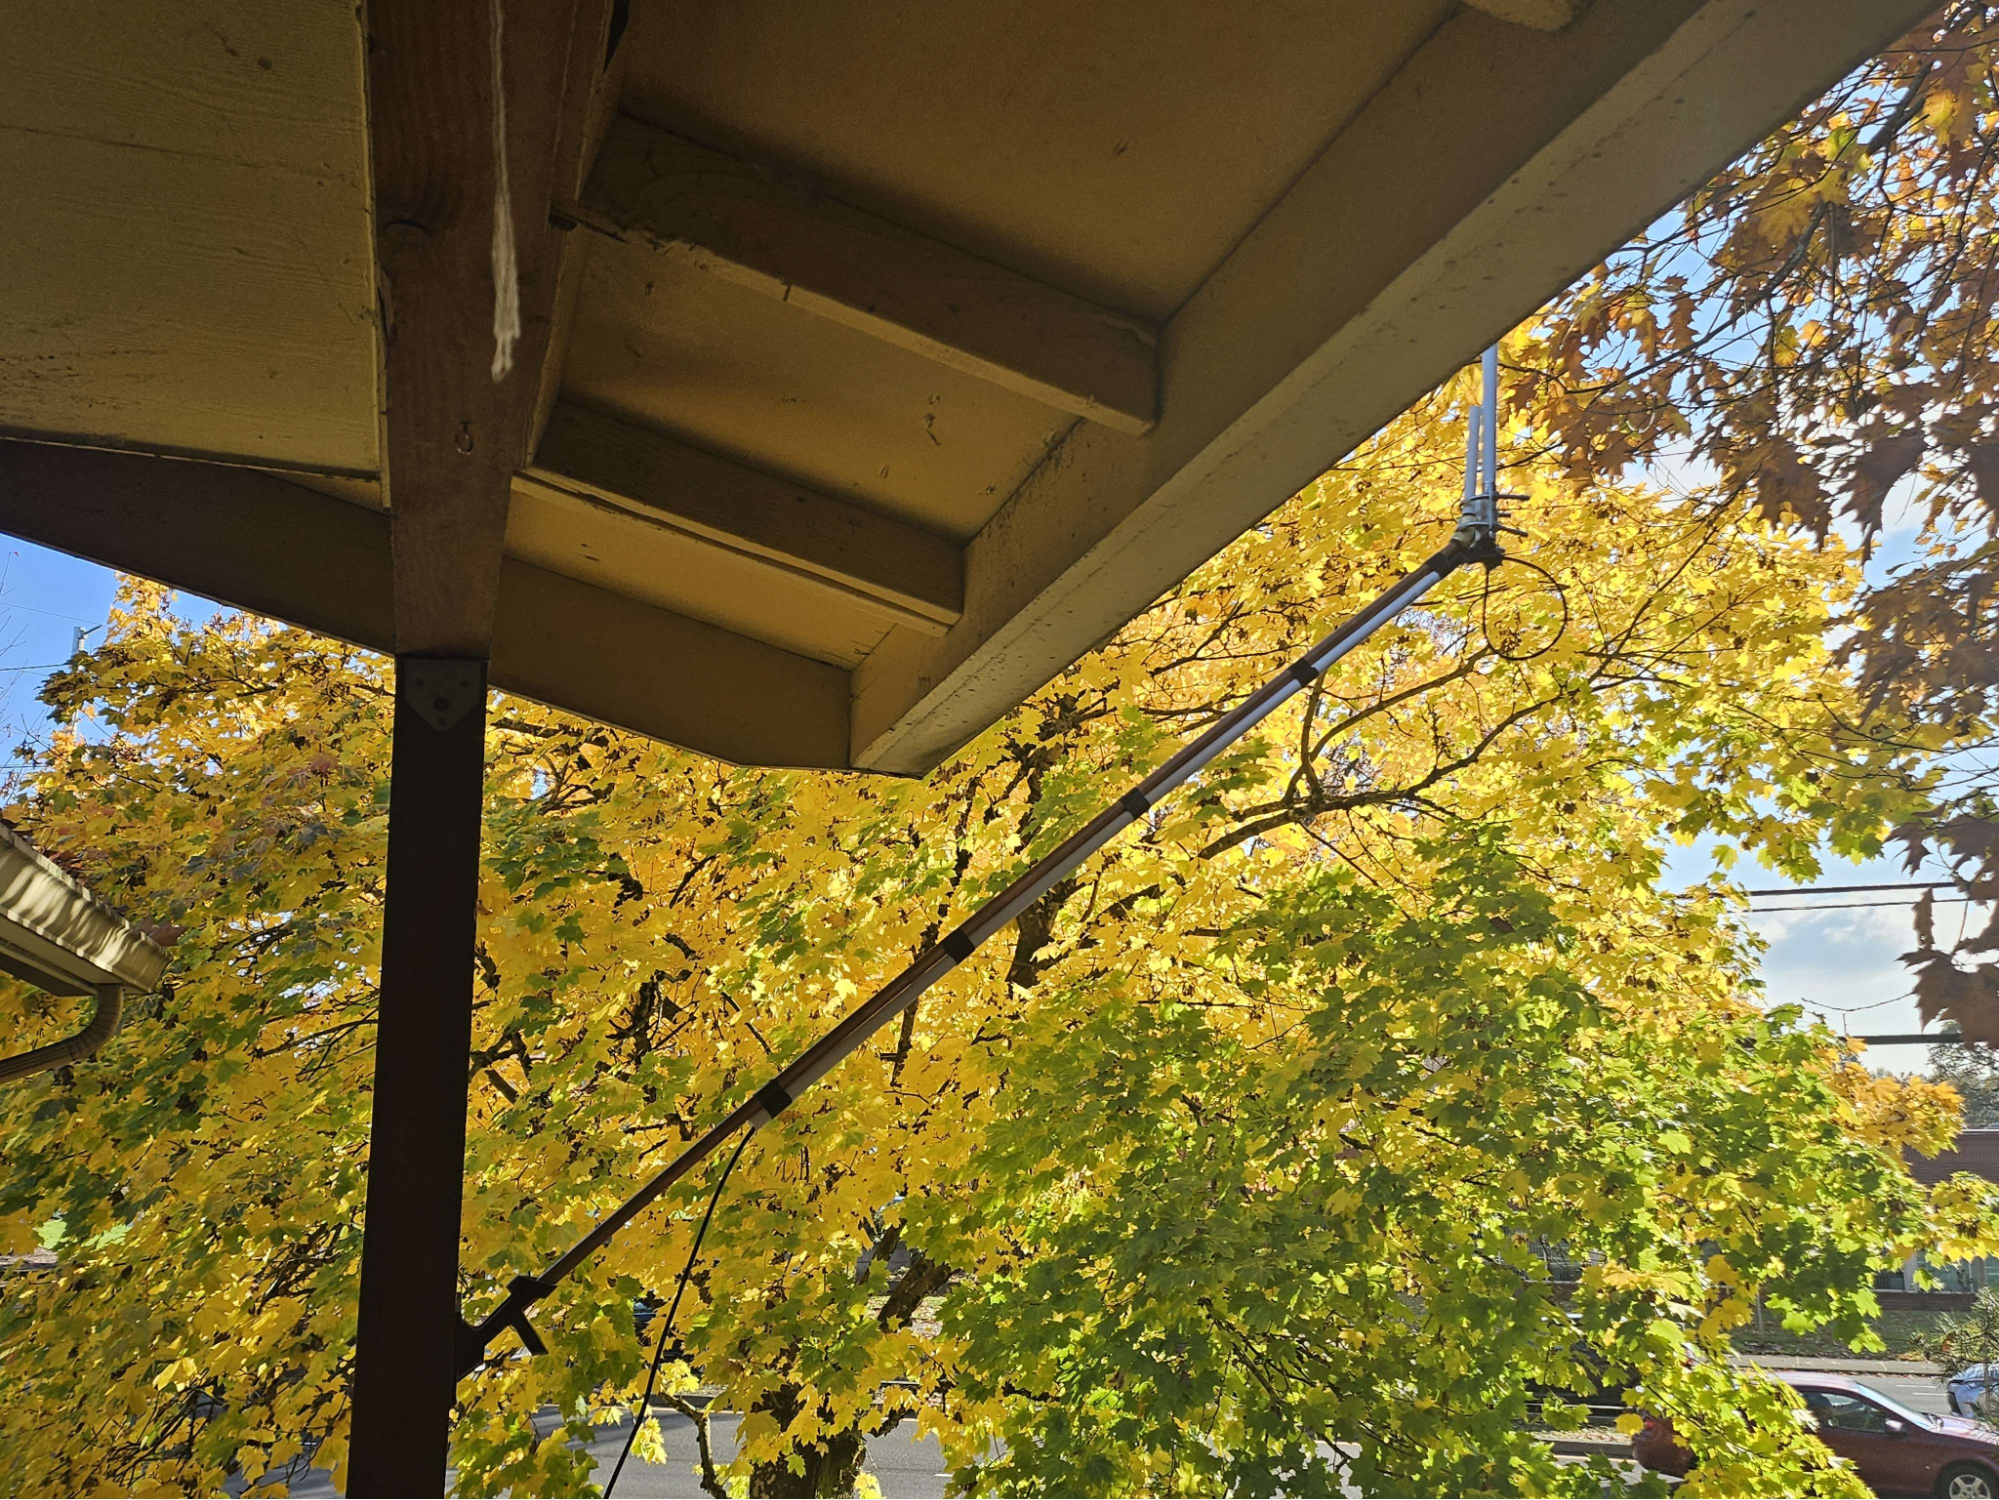
With some testing, I knocked it out on the first try. This design allowed me to place the copper pipe into the flag holder and tighten it down. The 45 Degree angle of the flag holder allowed me to cover the distance needed to get past the roof and gutters but keep enough distance to not sit right up against them. With the 45 Degree fitting, I can counteract the angle presented by the flag holder and have a nice straight place to mount the antenna.
I mounted the antenna to the PVC and cut off the excess. I decided to use the excess later to funnel the cable down. I added some electrical tape around the fitting and installed a very important drip loop to prevent water from going down my cable to my electronics. DON'T FORGET YOUR DRIP LOOPS! (See picture below for a good example why)

The Results of a better Antenna
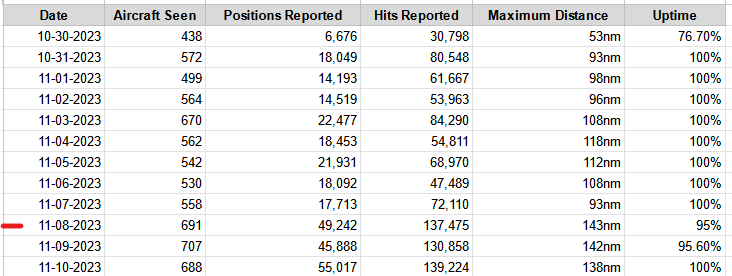
After the installation of the new antenna, I immediately increased my range by 50 nautical miles. I was also receiving a lot more Hits and Position reports. I installed the new antenna on November 8th, 2023, you an see the results in the table below:
The GIF below shows just a 16 hour span after the installation of the new antenna.
Unexpected Challenges
You are probably wondering why my uptime changed as well. I did not remove the USB extender that I previously set up with the initial antenna. This extender would cause connectivity loss to the SDR and the software would get locked out of access to the SDR due to a “process already using it”. The only way to fix this was to restart. Thankfully I fixed the issue quickly only to start having wireless problems!
As I was pondering on a solution to my wireless problem, I was on a late night trip to the store when I stopped by the tech section and found an amazing 90% OFF deal on some T-Link Powerline adapters. I have always avoided Powerlines that transmit Ethernet signals over existing power lines in your home but this just seemed like the right solution. So I took one home for just $10.00 USD.
When I got home, I was able to immediately plug both powerline adapters in, connect one to my router and the other to my raspberry pi. And with the power of DHCP, I had another IP address! I disabled wireless and bluetooth at the system level and have been on 100Mbps Ethernet on the outside power outlet of my apartment. This has greatly improved my connectivity and I am no longer running into issues.
Cost Conclusion
The cost of this project was initially just $44.00 for the SDR since I already had a Raspberry Pi. You can purchase one locally for $69.99 or ship one on Amazon for about $39.90. The antenna cost $51.00 and I did go a bit overkill with 25ft of cable, I am not using about 13ft of it. On the Home Depot run, I spent about $26 on the copper pipe, pvc pipe and 45’ degree fitting. Assuming you don’t need a sketchy flag holder pipe setup, you are looking at about $135.00 USD for my setup. If you stick with the regular antenna and it works well for you, you can easily get started for about $84.00 USD.
Overall Conclusion
I have been looking for a fun project where I can use tangible data to program something. I played around with an SDR a few years ago before I knew much about programming and remembered I could track airplanes since I sit right next to a flight school.
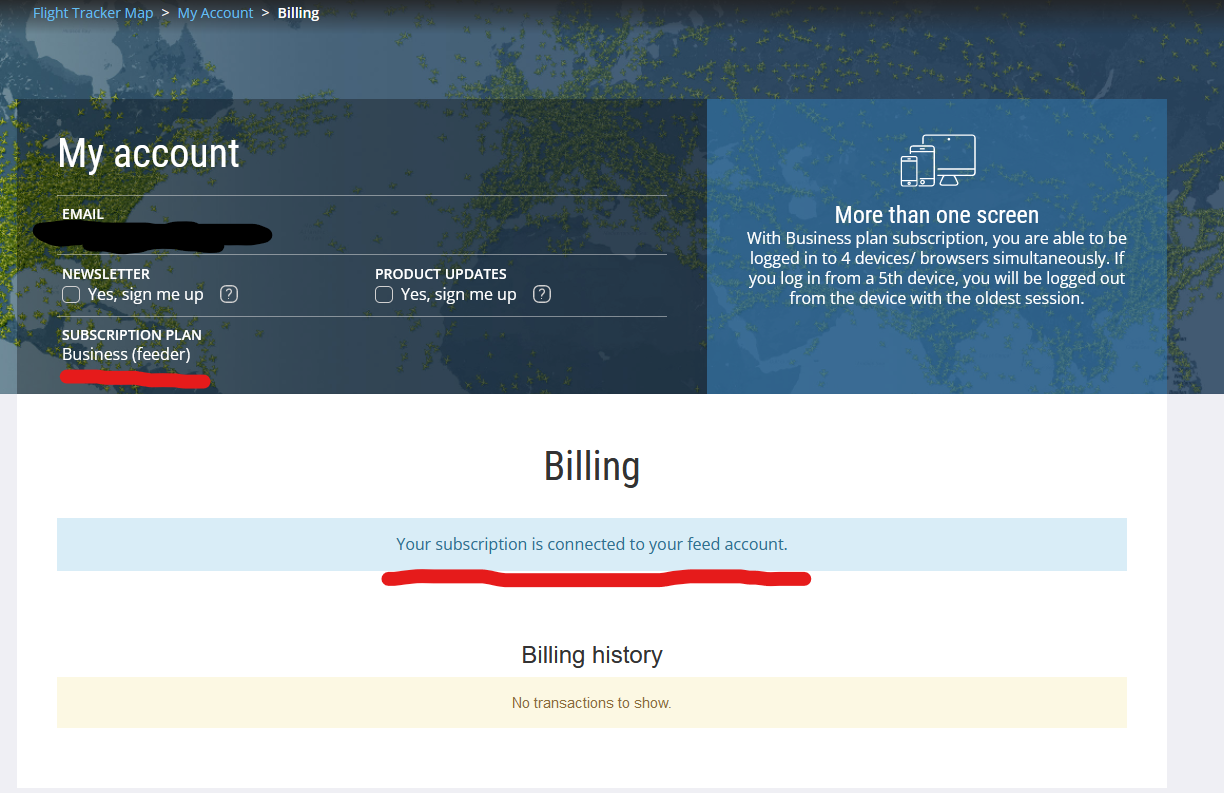
In the meantime, I get to contribute to a network of data streamers across the world at FlightRadar24 and who doesn’t like the free $499.99 subscription you get for becoming a data streamer!
I had a lot of fun setting this project up and I am excited to see how it turns out a few months down the road. I am even considering other projects in this category such as a completely remote ADS-B receiver that runs on mobile data and solar power. I have even started convincing my parents they need one on their roof!