Creating an ADSB receiver with a Raspberry Pi

 If you are looking for a fun project to do for a few days and potentially expand on it, this is it. When I began my project, I started with a Raspberry Pi 3B (1G RAM) that I already owned. I suggest getting a Model 3b+ or higher for this project. I initially started from the tutorial available on FlightRadar24’s site, located here:
https://www.flightradar24.com/build-your-own
They have their own image called “Pi24” which you can image onto a 4GB MicroSD card.
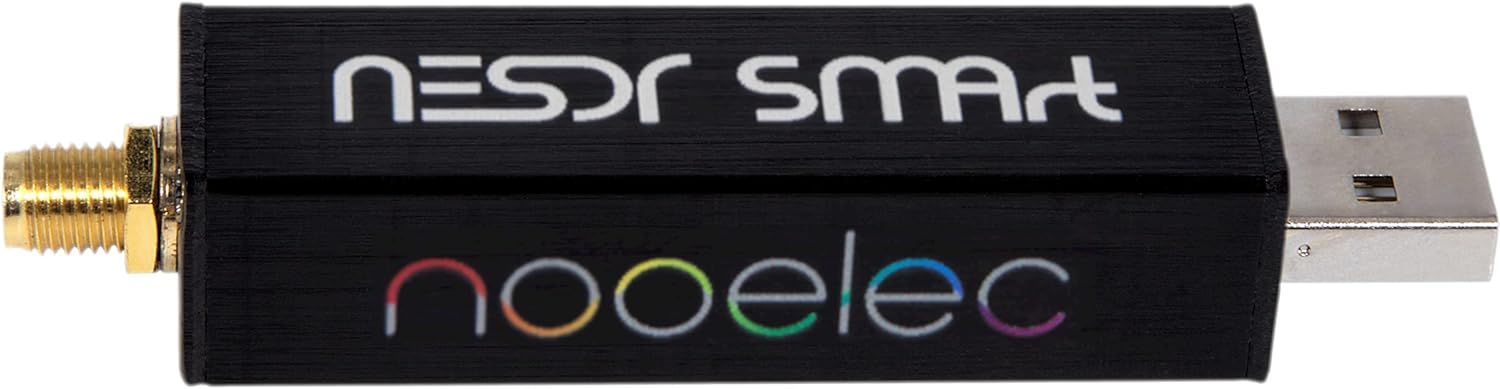
In addition to providing an image, they also make recommendations on ADS-B USB dongles for you Pi. I went with the Nooelec RTL-SDR v5 Bundle which you can find on Amazon or at Nooelec:
https://www.nooelec.com/store/
The Installation Process
Once you image your Pi and install your SDR, you are ready to power it up. You will need to locate your local address and SSH into it. The username is pi and the password is raspberry just like regular Pi images.
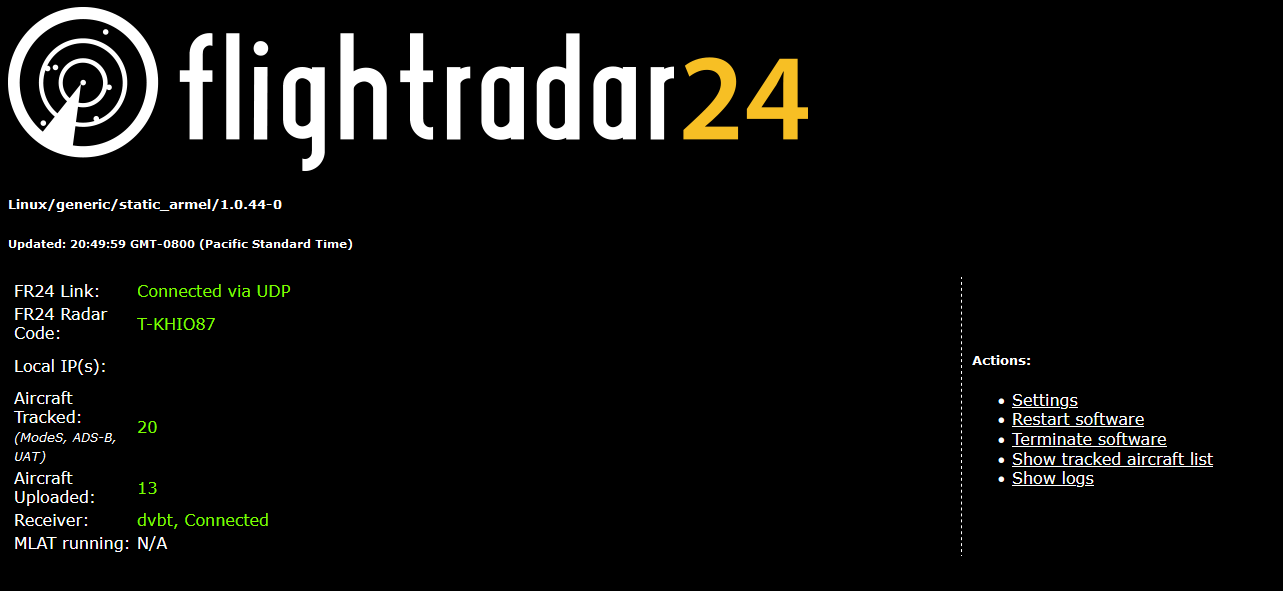
Once you have that IP Address, head over to:
http://IP-ADDRESS:8754
This is your FlightRadar Web Server.
Sign into your Flightradar24.com account and follow this link to activate your Pi24:
https://www.flightradar24.com/activate-raspberry-pi
If you are interested in using the raw data feed to build your own visuals with software such as VirtualRadar, you are going to want to enable RAW data on Port 30002.
Establishing your RAW data feed
While contributing to the FlightRadar24 network is fun, you really don’t get to see exactly what your station is picking up.
For this, I decided to go with Virtual Radar Server:
https://www.virtualradarserver.co.uk/
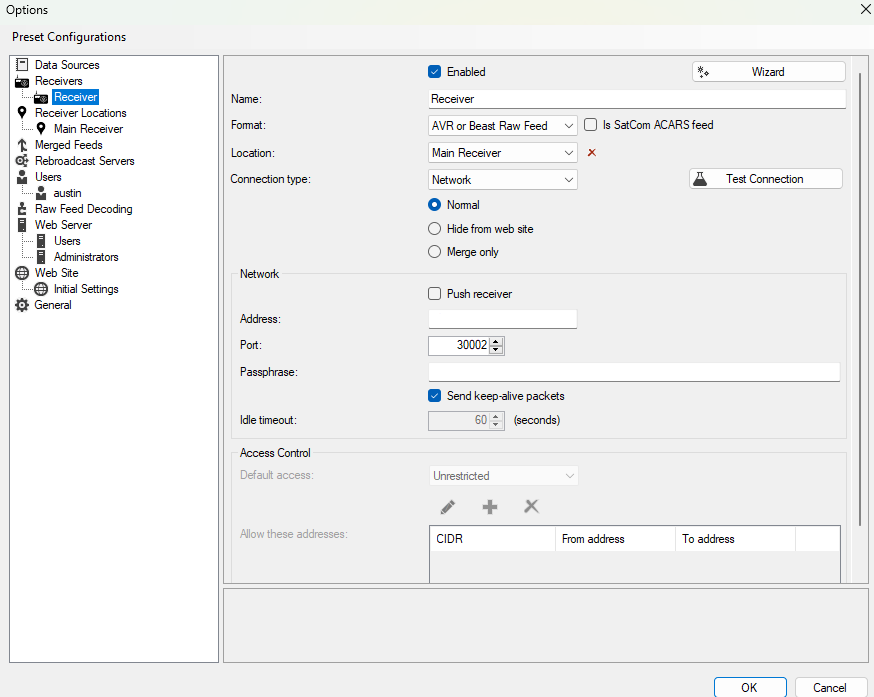
Name:
Format: AVR or Beast Raw Feed
Location:
Connection Type: Network (Normal)
Network Address:
Network Port: 30002
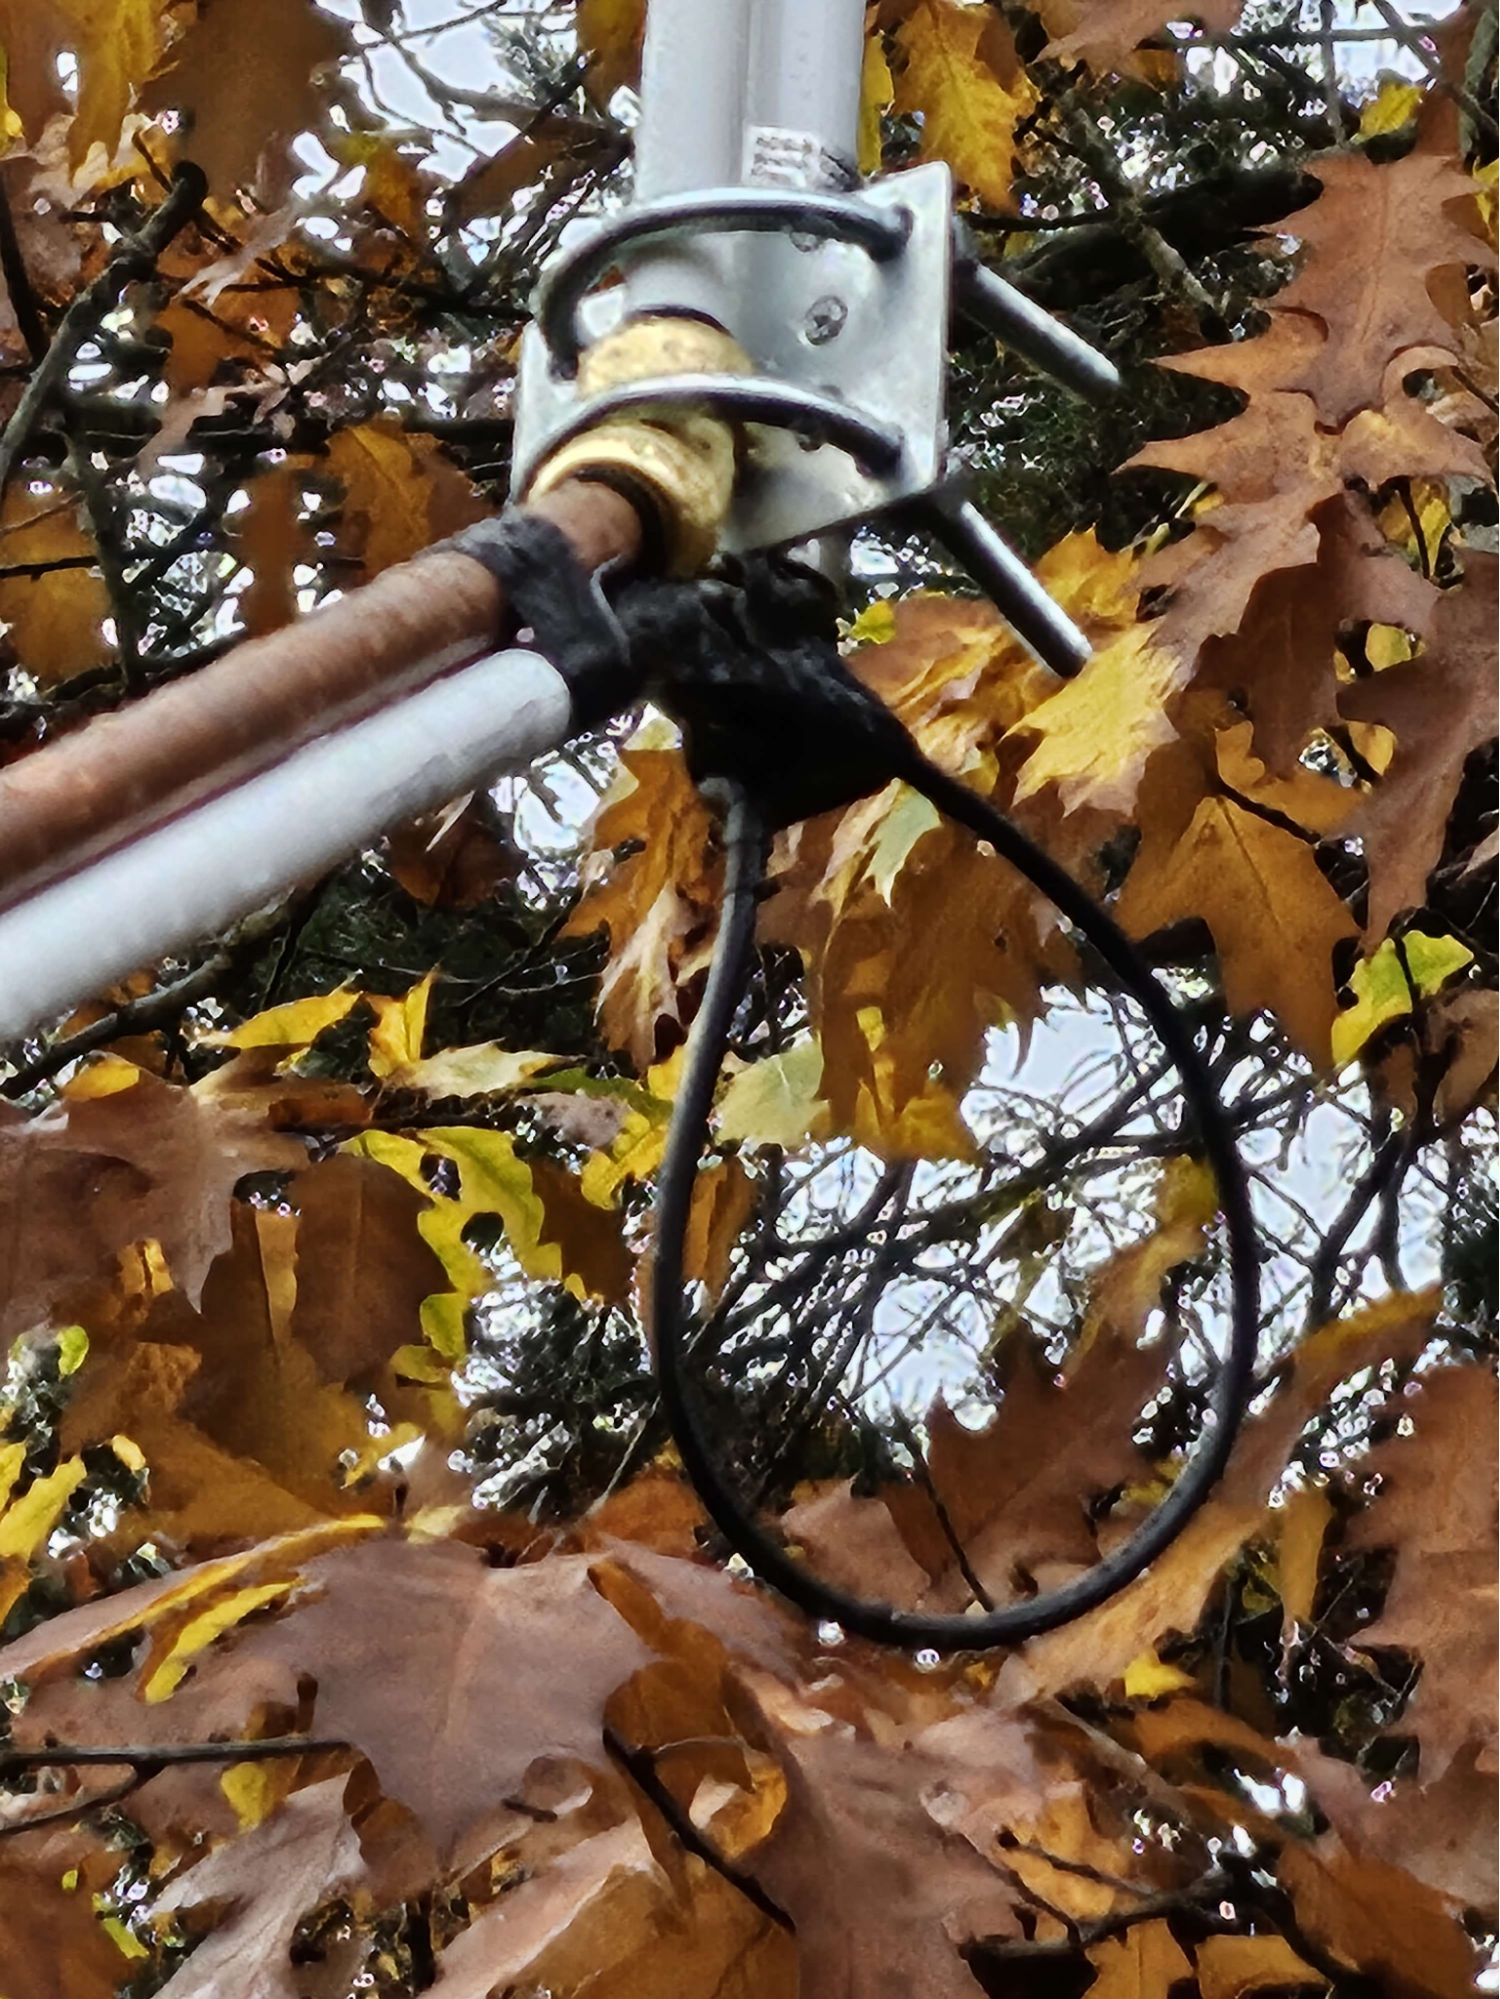
Stationing your Receiver

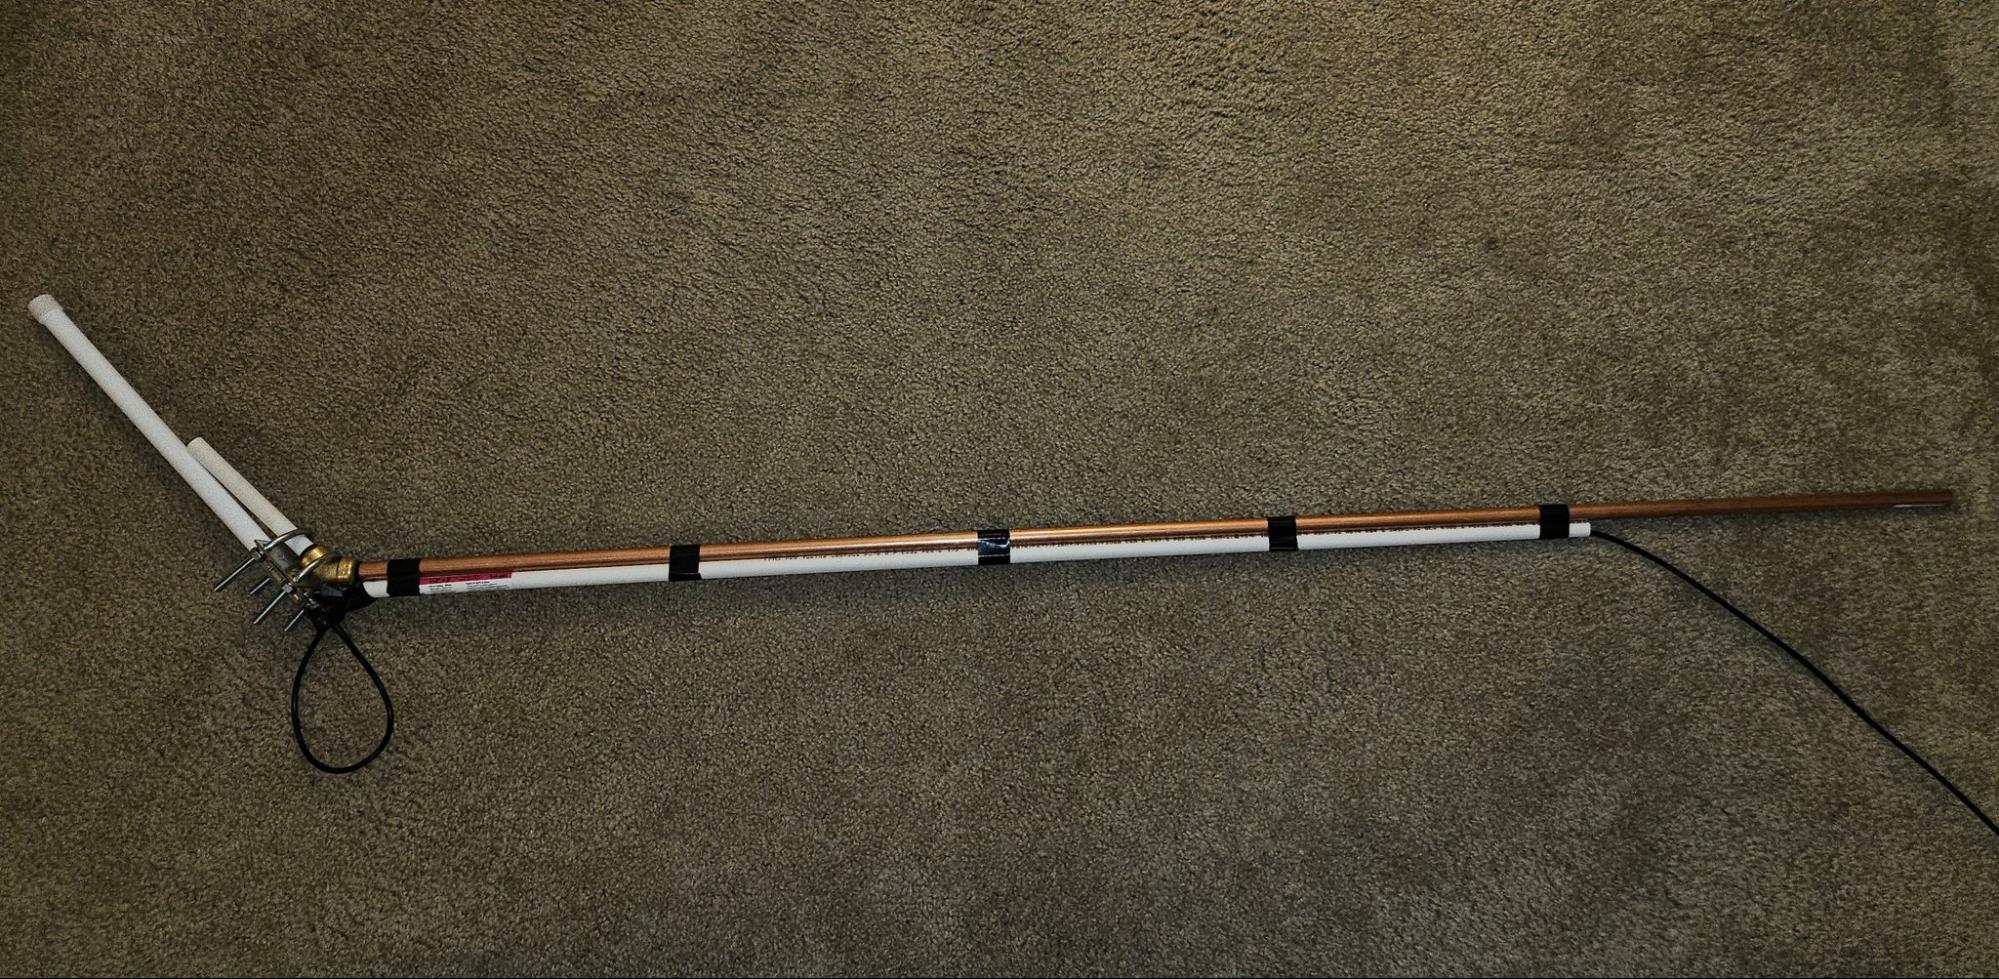
After a few days of running the standard antenna, I went on to Amazon and purchased an 18 inch 1090MHz ADS-B Antenna with a SMA connector.
With some testing, I knocked it out on the first try.

DON'T FORGET YOUR DRIP LOOPS!
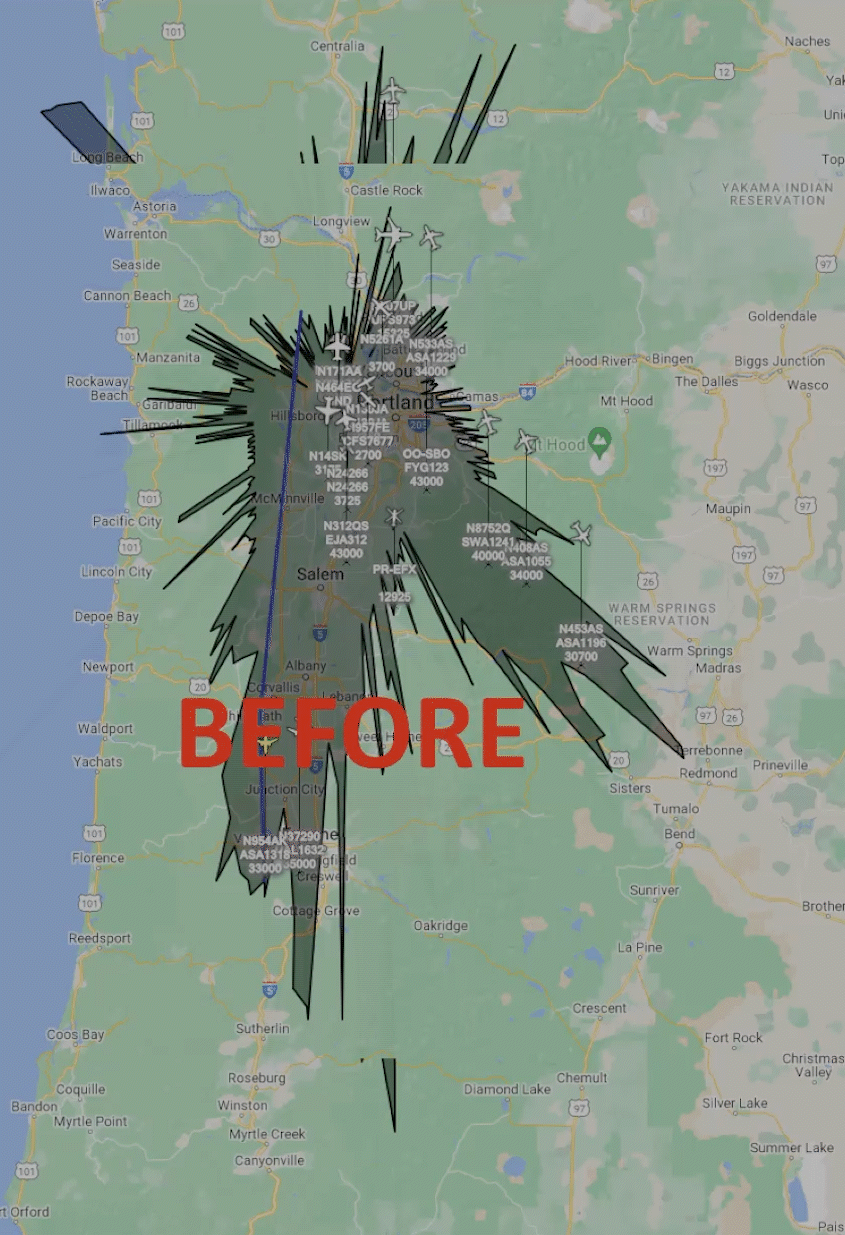
The Results of a better Antenna
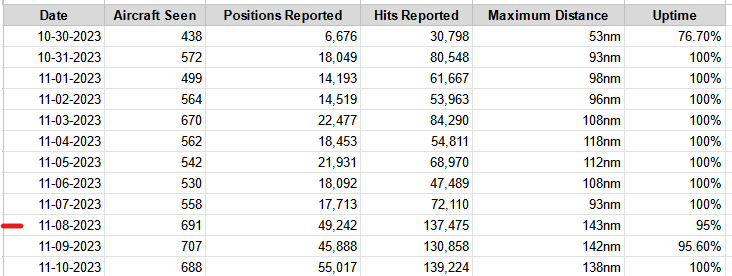
The GIF below shows just a 16 hour span after the installation of the new antenna.
Unexpected Challenges
I did not remove the USB extender that I previously set up with the initial antenna.
Cost Conclusion
The cost of this project was initially just $44.00 for the SDR since I already had a Raspberry Pi.
Overall Conclusion
I have been looking for a fun project where I can use tangible data to program something.
I had a lot of fun setting this project up and I am excited to see how it turns out a few months down the road.